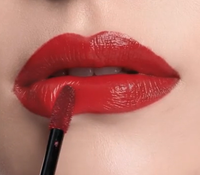


To blur the appearance of lip lines with tint, start with smooth, comfortable lips, remove excess balm, and apply one thin layer of a lightweight blurring formula. Spread color evenly from the center outward, keep the lips relaxed while the tint sets, and add a second thin layer only where more coverage is needed. A soft velvet finish and gently diffused edges reduce contrast, making fine lines look less prominent.
Blurring is a visual makeup effect. It does not erase, fill, repair, or permanently change natural lip lines. The most realistic goal is softer-looking texture at a normal viewing distance, not completely line-free lips.
Quick Tutorial: How to Blur Lip Lines in Seven Steps
- Gently remove loose flakes without over-scrubbing.
- Apply a light balm only if needed, then blot away surface oil.
- Wipe excess tint from the applicator.
- Spread one thin layer from the center of the lips outward.
- Tap over visible lines rather than repeatedly brushing through them.
- Keep the lips relaxed while the finish changes from wet shine to soft velvet.
- Add a small second layer only where natural lip color or texture still creates uneven contrast.
For a softer border, tap the outer edge with a clean fingertip or small lip brush before the formula fully settles. Avoid using a thick coat to cover lines; excess product can collect in texture and make it more visible.
What Does It Mean to Blur Lip Lines?
Every lip has natural vertical lines, folds, and movement. In makeup, "blur" describes a change in how color, edges, and reflected light make that texture appear.
A blurring lip look usually has:
- Diffused rather than sharply outlined color
- A soft velvet or soft-matte surface
- Less contrast between raised and recessed areas
- Even pigment without a thick painted layer
- Natural texture that remains visible at close range
The effect is similar to soft lighting in photography. Texture still exists, but harsh highlights and shadows become less obvious.
If you are new to the category, begin with What Is a Blurring Lip Tint? A Complete Guide to the Soft-Focus Lip Look.
Why Some Lip Products Make Lines Look More Visible
Lip lines become more noticeable when makeup increases contrast across the surface. Several factors can do this.
Strong, Directional Shine
High shine reflects bright highlights from curves and leaves darker shadows in recessed areas. This can create beautiful dimension, but under direct lighting it may also draw attention to surface texture.
A Very Flat, Heavy Matte Layer
A thick opaque matte can settle around flakes or flex unevenly as the lips move. When too much product collects along lines, color depth becomes uneven and the texture looks more pronounced.
Dry Flakes
Loose skin creates physical edges that catch pigment. A blurring formula can soften fine-line contrast, but it cannot disguise a lifted flake reliably.
Too Much Product
Heavy application takes longer to settle and is more likely to pool. Adding extra tint to "fill" lip lines usually creates more visible buildup instead.
Repeated Lip Rubbing
Pressing or rolling the lips together can pull wet pigment away from the center and push it into lines or borders. The result may look streaky rather than diffused.
Uneven Color Placement
A very dark outer border beside a lighter center can visually emphasize folds and create a ring around the mouth. Controlled gradients look intentional; accidental high contrast can make texture stand out.
Step 1: Prepare the Lip Surface Gently
Good preparation removes unstable texture without making the lips sore.
If Your Lips Are Already Smooth
Clean away old makeup and skincare residue. You may not need exfoliation or balm. Adding unnecessary products can make the surface slippery.
If You Have Loose Flakes
Soften them with water or a damp cloth and gently lift only what comes away easily. Do not scrub until the lips feel raw. If the lips are split, bleeding, swollen, burning, or painful, pause makeup and prioritize appropriate care.
If Your Lips Feel Tight
Apply a small amount of non-irritating balm earlier in your makeup routine. Give it time to absorb, then blot away visible oil immediately before tint.
The ideal surface feels comfortable but not coated. A thick balm layer can make tint slide, separate, or stay glossy longer.
For a fuller formula and preparation guide, read Best Lip Tint for Dry Lips: What to Look for in a Comfortable Formula.
Step 2: Use Less Tint Than You Think You Need
An overloaded applicator can leave one dark spot where it first touches the lip. It can also deposit enough liquid to gather inside deeper lines before the layer sets.
Lightly wipe one side of the applicator against the tube opening. Start with a small amount at the center of the lower lip and spread it outward before collecting more product.
One thin layer should create a continuous veil of color. It does not need to look fully opaque while still wet. Wait for the finish to settle before judging coverage because the change in reflection can affect how smooth and deep the shade appears.
Step 3: Apply Color Across Lines, Then Tap
Use the applicator to spread tint evenly across the natural direction of the lip surface. Avoid repeatedly tracing every vertical line; that can deposit more pigment inside the recesses.
Try this method:
- Place color at the center of the lower lip.
- Pull the tint outward with two or three controlled strokes.
- Apply the remaining product to the upper lip from the cupid's bow outward.
- Use the flat side of the applicator for broad areas and the tip only for edges.
- Tap lightly over any uneven section while the layer is still fresh.
Tapping redistributes surface color without scraping the applicator repeatedly through the same texture.
Step 4: Keep the Lips Relaxed During Setting
Stretching the lips wide during application can help you see the surface, but keeping them stretched while the product sets may create too little color in the natural folds. When the mouth relaxes, the result can look striped.
Apply with the lips in a mostly natural position. Open the mouth slightly only when you need access to the corners or inner edge.
After applying:
- Keep the lips relaxed and slightly apart
- Avoid pressing, pursing, or rolling them together
- Let the obvious wet shine soften
- Wait until the color stops moving easily before touching it again
There is no universal setting time. Use the finish as your cue. Learn more in Gloss to Matte Lip Tint: How a Shine-to-Blur Formula Works.
Step 5: Build Coverage with a Targeted Second Layer
Once the first layer settles, view the lips from a normal conversational distance as well as close up. A finish that looks natural from a typical distance does not need to become completely texture-free under magnification.
If more coverage is needed:
- Add a tiny amount to lighter areas rather than recoating everything
- Keep the second layer thinner at the outer border
- Tap the boundary between old and new color
- Let the new layer settle without rubbing the lips
Two thin layers can create better color control than one thick layer. However, more product is not always more blurring. Stop when the surface looks even enough and still feels light.
Step 6: Diffuse the Lip Edge
A hard outline creates strong contrast between lip color and surrounding skin. Softening that outline can make the entire lip look more diffused, which supports the soft-focus effect.
For blurred edges:
- Keep the main color just inside the natural lip border.
- Before the tint fully sets, tap the perimeter with a clean fingertip or small brush.
- Blend inward and sideways rather than dragging color far outside the lip.
- Use minimal product at the corners.
- Clean accidental marks outside the lip with a precise cotton swab.
The aim is a controlled haze, not an undefined stain around the mouth.
Three Soft-Focus Techniques for Different Lip Looks
Technique 1: Even Velvet Full Lip
This technique gives the most uniform color while keeping the finish soft.
- Apply a thin layer over the full lip.
- Use less product at the corners and wet inner edge.
- Let the layer settle completely.
- Add pigment only where natural lip color still shows unevenly.
- Tap the outer border once for a subtly softened edge.
This look works well when you want polished color without the sharp structure of traditional liquid lipstick.
Technique 2: Center-Focused Gradient
A gradient draws attention toward the center and keeps the outer lip soft.
- Place tint on the inner half of the upper and lower lips.
- Tap outward with a fingertip or brush.
- Leave the outer third lighter.
- Let the first layer settle.
- Add a small second layer only at the center.
Use gradual transitions. A sudden dark center beside a bare outer lip can look patchy rather than intentionally blurred.
Technique 3: Soft Border with Natural Dimension
This technique keeps fuller color but removes the visibly drawn outline.
- Apply a thin full-lip layer.
- Use the applicator tip to correct gaps without tracing a heavy border.
- Tap around the cupid's bow and lower-lip edge.
- Preserve the natural shape rather than overlining.
- Let the tint settle before adding more definition.
This is often the easiest everyday approach because it combines even color with a forgiving perimeter.
Where to Add and Where to Avoid Extra Product
| Lip Area | Recommended Placement | Why |
|---|---|---|
| Center of lower lip | Begin with the most product here | Provides space to spread color before it sets |
| Cupid's bow | Use the applicator tip sparingly | Maintains shape without a heavy outline |
| Outer border | Use a thin veil and tap the edge | Reduces harsh contrast |
| Corners | Apply very little product | Prevents pooling and a dark corner effect |
| Visible lighter patches | Add a targeted second layer | Improves evenness without thickening the full lip |
| Wet inner lip | Use minimal product | Moisture and friction make this area fade faster |
Strategic placement is more useful than trying to apply the exact same amount everywhere.
Should You Use Lip Liner to Blur Lip Lines?
Lip liner is optional. It can improve shape and reduce feathering, but a dark, sharply drawn outline works against a soft-focus effect.
If you use liner:
- Choose a shade close to the tint or your natural lip color
- Use light strokes instead of filling the whole lip heavily
- Blend the liner inward before applying tint
- Soften the border rather than leaving a visible ring
- Avoid drawing far beyond the natural lip shape
For the softest result, use liner only where the shape needs support, such as the cupid's bow or one uneven edge.
How Finish and Shade Affect Visible Lip Lines
Soft-Focus Velvet Finish
A velvet surface reflects light less sharply than wet gloss. Reduced highlight-and-shadow contrast can make fine lines appear softer while preserving natural dimension.
High Gloss
Gloss can make lips look plumper and smoother from some angles, but strong highlights may reveal texture under direct light. It is a different visual strategy, not a worse finish.
Deep Shades
Deep colors create more contrast with bare skin and natural lip tone. Uneven placement, inner-lip fading, or product collected in lines may therefore be easier to see.
Nude and Medium Shades
Lower-contrast shades often create a more forgiving transition at the border and during fading. They still need even application, especially when the formula is highly pigmented.
The best shade is one that suits your look and application comfort. You do not need to avoid deep color; use thinner layers and make targeted corrections.
Common Mistakes That Emphasize Lip Lines
Trying to Fill Lines with a Heavy Coat
Lip tint is color, not a texture filler. A thick layer can collect in recesses and flex unevenly. Start thin.
Over-Exfoliating Before Makeup
Aggressive scrubbing can leave the lips irritated and create more unstable texture. Remove only loose flakes gently.
Leaving Too Much Balm Underneath
Excess oil can make pigment slide into lines or remain uneven. Blot until the surface is comfortable but not slippery.
Stretching the Lips While the Tint Sets
Color may look even on stretched lips but reveal gaps when the mouth returns to its natural position. Let the tint settle while relaxed.
Rubbing the Lips Together
Repeated pressing moves wet color and can create a lighter center with darker edges. Use controlled tapping instead.
Layering Before the First Coat Settles
The applicator may lift the mobile first layer and create streaks. Wait until the wet shine softens.
Inspecting Only at Extreme Close Range
Natural lips have texture. Evaluate the result in normal lighting and at a realistic viewing distance before adding unnecessary product.
If pigment already looks uneven, use Why Does Lip Tint Look Patchy? 7 Causes and Easy Fixes to identify the specific problem.
Why Altera Works for a Soft-Focus Lip Look
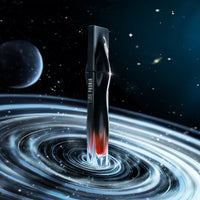
Altera Blurring Lip Tint begins with a cooling watery gloss that spreads easily, then settles into a weightless, soft-focus velvet matte. Time Phoria describes the formula using Pure Blur Technology and an Elastomer Water Blend.
Its approach supports a blurred lip look through:
- A watery texture that can be distributed in a thin layer
- Silicone and elastomer materials that provide slip and softness
- A flexible, airy velvet finish
- Buildable pigment for one- or two-layer application
- Diffused reflection that can soften the appearance of lip lines
- A non-sticky intended feel that avoids a heavy lipstick effect
The formula does not remove natural lip texture, and results vary with lip condition, amount applied, shade, lighting, and technique.
For the complete Altera application method, read How to Apply Blurring Lip Tint for a Smooth, Even Finish.
Which Altera Shades Work Well for Soft-Focus Looks?
Altera is available in 17 shades. These three popular colors provide different levels of contrast:
- 012 HUSH: a nude pink for a soft, lower-contrast blurred lip
- 013 FLUSH: a medium pink for a balanced everyday soft-focus look
- 001 FLUX: a brownish red for deeper definition with a diffused edge
All three are available in the Best-Sellers Lip Tint Trio.
Natural lip tone and skin tone affect how each shade appears. HUSH may create a subtler border on some lips, while FLUX may make application differences more visible because it is deeper. Neither result is universal, so use official swatches as comparison guidance rather than an exact guarantee.
FAQs
Can lip tint really blur lip lines?
A blurring tint can soften the appearance of lip lines by creating even color, diffused edges, and less sharply reflected light. It cannot remove, fill, or permanently change natural lip texture.
What type of lip tint is best for visible lip lines?
Look for a lightweight, spreadable formula with a soft-focus velvet or diffused finish. Buildable pigment and a flexible layer are generally easier to control than one thick, rigid coat.
Should I exfoliate before using blurring lip tint?
Only remove loose flakes gently. Do not aggressively scrub lips that are sore, split, irritated, or already smooth. Over-exfoliation can make the surface less comfortable.
Should I apply lip balm first?
Use a small amount if your lips feel dry, allow it to absorb, and blot excess before tint. A thick oily layer can make pigment move or collect unevenly.
Does gloss or matte hide lip lines better?
They create different optical effects. Gloss adds dimension and can make lips look fuller, while soft matte reduces sharp reflection and can diffuse fine-line contrast. Formula quality and application matter more than the category name alone.
Why does lip tint settle into my lines?
Common causes include too much product, loose flakes, excess balm, repeated brushing, lip rubbing, or a layer that has not settled. Remove unstable product and rebuild with a thinner coat.
Can I use two layers to cover lip lines?
Yes, but let the first thin layer settle and add the second only where more color is needed. Heavy full-lip layering can emphasize texture instead of blurring it.
How do I blur the outer lip edge?
Keep color just inside the natural border and tap the edge with a clean fingertip or small brush before the tint fully sets. Blend inward and sideways without spreading pigment far outside the lip shape.
Do deeper shades make lip lines more visible?
Not inherently, but stronger contrast can make uneven placement or fading easier to notice. Apply deep shades in controlled thin layers and correct only the areas that need more pigment.
Is a soft-focus finish supposed to look completely smooth up close?
No. Real lips retain natural lines and movement. A successful soft-focus finish looks more diffused and even at a normal viewing distance, not digitally texture-free under magnification.
Final Takeaway
The most effective way to blur lip lines is not to cover them with more product. Prepare the surface gently, remove excess oil, apply a small amount of lightweight tint, tap rather than over-brush, and let each layer settle while the lips are relaxed.
A soft velvet finish and diffused edge reduce visual contrast, making fine lines look less prominent without creating an artificial, texture-free result. Stop when the color looks balanced and the layer still feels light.
Explore all 17 shades of Altera Blurring Lip Tint, or try 012 HUSH, 013 FLUSH, and 001 FLUX together in the Best-Sellers Lip Tint Trio.