

To apply blurring lip tint evenly, begin with clean, smooth lips and remove excess balm or oil. Use a small amount of tint, spread one thin layer from the center outward, and keep your lips relaxed while the watery shine settles into a soft-focus finish. Add a second thin layer only after checking the first, then refine the edges or inner lip where needed.
The key is control. Too much product, repeated rubbing, or fast layering can move pigment and create uneven areas. Thin layers and a short setting pause usually produce a smoother, lighter-looking result.
Quick Guide: How to Apply Blurring Lip Tint
- Gently smooth away loose flakes and start with clean lips.
- If needed, apply a light layer of balm, allow it to absorb, and blot away excess.
- Wipe extra tint from the applicator before touching the lips.
- Apply one thin layer from the center of the lips toward the edges.
- Keep the lips relaxed while the wet shine softens into a velvet finish.
- Add a second thin layer for deeper color or fuller coverage.
- Correct only the areas that need more product instead of coating everything again.
This method works for full-lip color, softly blurred edges, and gradient lip looks. The placement changes, but the thin-layer principle stays the same.
Step 1: Prepare Your Lips Without Over-Scrubbing
A blurring finish can soften the appearance of fine lip lines, but it cannot hide loose flakes. Pigment may collect around peeling areas and make an otherwise smooth formula look patchy.
Before applying tint:
- Remove any previous lip color completely.
- If the lips are flaky, soften them with water or a damp cloth and gently lift only loose skin.
- Do not scrub lips that feel cracked, sore, or irritated.
- Apply a small amount of lip balm if the lips feel tight.
- Give the balm time to absorb, then blot away the slippery surface.
The goal is comfortable lips with a clean surface, not lips covered in a thick layer of oil. Too much balm can dilute the color, keep the tint mobile, and make the glossy stage last longer.
If your lips are already smooth and comfortable, you may not need balm at all.
Step 2: Control How Much Product Is on the Applicator
More product does not automatically create a smoother or richer lip. With watery or high-pigment formulas, excess tint can gather around the inner lip, settle more slowly, or create a darker border around lighter areas.
Pull out the applicator and lightly wipe one side against the opening of the tube. You should still have enough color to cover the lips, but the applicator should not look overloaded or drip.
Start with less than you think you need. You can add color after the first layer settles; removing a heavy, uneven coat is much harder.
Step 3: Apply the First Thin Layer from the Center Outward
Place the first touch of color near the center of the lower lip, where you usually want the most pigment. Spread it toward each corner using light, controlled strokes. Then apply the remaining product to the upper lip, beginning around the cupid's bow and moving outward.
For an even full-lip application:
- Cover the center of the lower lip first.
- Pull the color outward without repeatedly brushing the same area.
- Trace the upper lip with the thinner side or tip of the applicator.
- Use less product at the corners and outer border.
- Check that the inner lip is connected to the main color, but do not flood the wet inner edge.
You do not need to create a perfectly sharp outline. A blurring tint is well suited to a softly diffused border, and small edge differences can be blended before the formula settles.
Step 4: Do Not Rub Your Lips Together While the Tint Sets
Pressing the lips together is an automatic habit, especially when a tint feels watery. However, repeated rubbing can pull still-wet pigment away from the center, move it into lip lines, or leave more color on one lip than the other.
After the first layer:
- Keep your mouth in a relaxed, slightly open position.
- Avoid rolling, pursing, or rubbing the lips together.
- Let the obvious wet shine begin to soften.
- Check whether the color has stopped moving easily before adding more.
There is no single setting time that works for every person. Layer thickness, lip preparation, room conditions, and the formula all affect the transition. Visual cues are more reliable than a fixed number of seconds.
For more detail on this finish change, read Gloss to Matte Lip Tint: How a Shine-to-Blur Formula Works.
Step 5: Build Color with a Second Thin Layer
Once the first layer has settled, decide whether you actually need more. One layer can create a lighter, softer effect, while a second layer can deepen the shade and improve coverage over naturally pigmented lips.
When adding a second layer:
- Focus first on areas where natural lip color still shows unevenly.
- Use a thin coat rather than reloading the lips heavily.
- Apply less around the outer border if you want a soft-focus edge.
- Allow the second layer to settle just as you did the first.
Two controlled layers are usually easier to keep even than one thick coat. They also give you more control over how the final shade looks on your natural lip tone.
Step 6: Refine the Border and Inner Lip
Wait until the finish becomes less wet before deciding what needs correction. Fixing the lips too early can create more movement instead of solving the uneven area.
If the Outer Border Looks Uneven
Use the clean edge of the applicator, a small lip brush, or a clean fingertip to soften the border before it fully settles. Blend inward rather than dragging pigment beyond the natural lip line.
For a cleaner edge, use a cotton swab with a very small amount of makeup remover around the outside of the lip. Keep remover away from the finished color so it does not break down the edge again.
If the Inner Lip Looks Lighter
Open the mouth slightly and place a tiny amount of tint only where the color is missing. Feather it into the existing layer and allow it to settle. Avoid coating the wet mucosal area far inside the mouth, where any lip product is more likely to fade.
If One Area Is Too Dark
Do not add product everywhere else immediately. While the area is still fresh, lift a small amount with a clean fingertip or cotton swab, then soften the remaining edge. After it settles, decide whether a light second layer is necessary.
Three Ways to Wear Blurring Lip Tint
The same formula can create different results depending on where you place the pigment.
1. Smooth Full-Lip Color
Best for an even, polished finish with stronger color payoff.
- Apply a thin layer across the entire lip surface.
- Keep the center slightly richer than the corners.
- Let the first layer settle.
- Add a second layer only where more coverage is needed.
For a more defined shape, trace the border with the tip of the applicator. For a softer effect, lightly diffuse the edge before setting.
2. Softly Blurred Lip Edges
Best for a casual, diffused look without a sharp outline.
- Apply color inside the natural lip border.
- Use a clean fingertip or small brush to tap the outer edge outward gently.
- Stop before the color spreads beyond the natural lip shape.
- Let the finish settle without rubbing the lips together.
Tapping works better than wiping because it softens the border without removing a large section of color.
3. Gradient Lips
Best for concentrated color in the center with softer edges.
- Place a small amount of tint on the inner half of both lips.
- Tap the color outward with a fingertip or lip brush.
- Keep the outer third of the lips lighter.
- Let the first layer settle.
- Add a small second layer only to the center for more contrast.
Do not use a heavy dot of product and then rub the lips together. Controlled tapping creates a more intentional gradient.
How to Apply Blurring Lip Tint on Dry Lips
Dry-feeling lips can still wear a velvet-matte tint, but preparation and layer thickness matter more.
Use this adjusted method:
- Apply balm before beginning the rest of your makeup.
- Let it absorb while you complete other steps.
- Blot away visible oil immediately before lip color.
- Apply the thinnest even layer that gives useful coverage.
- Add a second layer only where needed instead of covering every area again.
Avoid applying tint directly over active flakes and then trying to smooth them with the applicator. That can lift the color already in place. If the lips are cracked or uncomfortable, prioritize lip care and wait before using a strongly pigmented product.
Blurring makeup changes the appearance of texture; it does not treat or repair the lips.
How to Prevent Blurring Lip Tint from Looking Patchy
| What You See | Likely Cause | What to Do |
|---|---|---|
| Dark patches and light gaps | Too much product or repeated brushing | Lift excess while fresh, then use a thinner layer |
| Color gathers around flakes | Loose or peeling skin | Gently prepare lips before application; do not layer over flakes |
| Center loses color quickly | Rubbing lips, moisture, or friction at the inner lip | Keep lips relaxed while setting and touch up only the missing area |
| Tint slides instead of setting | Too much balm or oil underneath | Blot the lip surface before applying color |
| Second coat lifts the first | Layering before the first coat settles | Wait until the first layer stops moving easily |
| Border looks harsh | Too much pigment at the outer edge | Use less product at the perimeter and tap to diffuse |
| Finish stays very glossy | Heavy application or oily base | Allow more setting time and use less product next time |
If patchiness appears after eating or drinking, remove loose or uneven residue before adding more tint. Repeatedly layering fresh color over a broken surface can make the difference more visible.
Common Application Mistakes
Treating the Formula Like a Traditional Lip Gloss
A gloss can usually be rubbed across the lips repeatedly. A gloss-to-matte tint needs a moment to settle, so constant movement can interrupt the final finish.
Using One Heavy Coat for Full Coverage
A thick layer may look saturated at first, but it is harder to distribute evenly and may remain mobile for longer. Build coverage with thin layers.
Judging the Shade While It Is Still Wet
The fresh shine can change how deep and reflective the color appears. Let the first layer reach its velvet finish before deciding whether to add more.
Adding Balm Immediately on Top
Applying balm before the tint has settled can move pigment and restore surface shine. If you want a glossier result, recognize that the finish and transfer behavior will no longer be the same as the tint worn alone.
Expecting Blur to Erase Every Lip Line
A soft-focus finish can reduce the visual emphasis on fine lines, but natural lip texture remains. Thin, even application is more realistic and usually more flattering than trying to bury lines under extra product.
Applying Altera Blurring Lip Tint
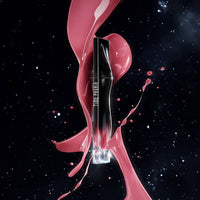
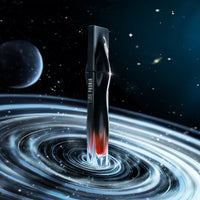
Altera Blurring Lip Tint applies with a cooling watery gloss and settles into a weightless, soft-focus velvet matte. Its buildable color can be worn as one thin layer for a softer result or two layers for greater depth and coverage.
For Altera specifically:
- Apply a suitable amount evenly to clean, prepared lips.
- Wait briefly as the watery texture develops into its soft matte finish.
- Add another thin layer if you want deeper color or fuller coverage.
The range includes 17 shades. Three popular starting points are 001 FLUX, a brownish red; 012 HUSH, a nude pink; and 013 FLUSH, a medium pink. They are also available together in the Best-Sellers Lip Tint Trio.
Natural lip color, lighting, number of layers, and skin tone can affect the final shade. Wear and transfer can vary with moisture, meals, friction, and application method.
If you are new to this type of finish, begin with What Is a Blurring Lip Tint? or compare other formulas in the Time Phoria lip makeup collection.
FAQs
Should I apply lip balm before blurring lip tint?
Use a small amount if your lips feel dry. Allow it to absorb and blot away excess oil before applying tint. A thick, slippery balm layer can make color move or settle unevenly.
How much blurring lip tint should I use?
Start with enough for one thin layer. Lightly wipe excess from the applicator, then build color only after the first layer settles. The exact amount depends on the applicator, formula, and lip size.
Should I rub my lips together after applying lip tint?
Avoid repeated rubbing while a watery-to-matte tint is setting. It can move pigment away from the center and create uneven coverage. Keep the lips relaxed instead.
Can I apply two layers of blurring lip tint?
Yes. Let the first thin layer settle, then add a second thin layer for deeper color or more coverage. Focus the second layer where it is needed rather than automatically coating the entire lip again.
Do I need lip liner with blurring lip tint?
No. Apply the tint alone for soft or gradient edges. Use a coordinating liner only when you want a more defined shape or need help keeping deeper color within the lip border.
Why does my lip tint look patchy?
Common causes include loose flakes, too much balm, an overloaded applicator, rubbing the lips, or layering before the first coat settles. Remove uneven residue if necessary and rebuild with thin layers.
How do I make a blurred lip edge?
Keep the color just inside the natural lip border, then tap the edge with a clean fingertip or small brush before the formula fully settles. Tapping creates a softer transition than wiping.
How do I touch up the inner lip?
Remove any loose color, apply a very small amount only to the faded area, and feather it into the existing tint. Avoid adding a thick full-lip coat when only the center needs correction.
Can I put gloss over blurring lip tint?
Yes, after the tint has settled, but gloss will change the velvet-matte appearance and may affect transfer and wear. Apply it mainly to the center if you want dimension without fully covering the blurred finish.
Final Takeaway
A smooth blurring lip tint application depends less on speed and more on control. Prepare the lips gently, remove excess oil, begin with a small amount, and let each thin layer settle before adding more. Keep the lips relaxed during the transition and correct individual areas instead of repeatedly recoating the whole lip.
That method gives the formula room to create its intended soft-focus finish while letting you choose between full color, blurred edges, and a center-focused gradient.
Explore all 17 shades of Altera Blurring Lip Tint, or try 001 FLUX, 012 HUSH, and 013 FLUSH together in the Best-Sellers Lip Tint Trio.